London Tube Map: Lines, Zones, Stations and How to Read It
The London Tube map is one of the most recognisable transport maps in the world. At first glance, its coloured lines, circles, labels and fare-zone boundaries can look busy. Once you understand its basic layout, however, it becomes a practical tool for travelling across London without relying on a street-by-street route.
The map is designed to show connections, not precise geography. It helps passengers see which line serves a station, where a change is possible, and how a journey moves through London’s fare zones. That is why stations that look close on the map may involve a longer walk above ground, while stations positioned far apart may be only a short train journey away.
This guide explains how to read the London Tube map, use it for route planning, and avoid common mistakes when travelling on the Underground.
Start With the Coloured Lines
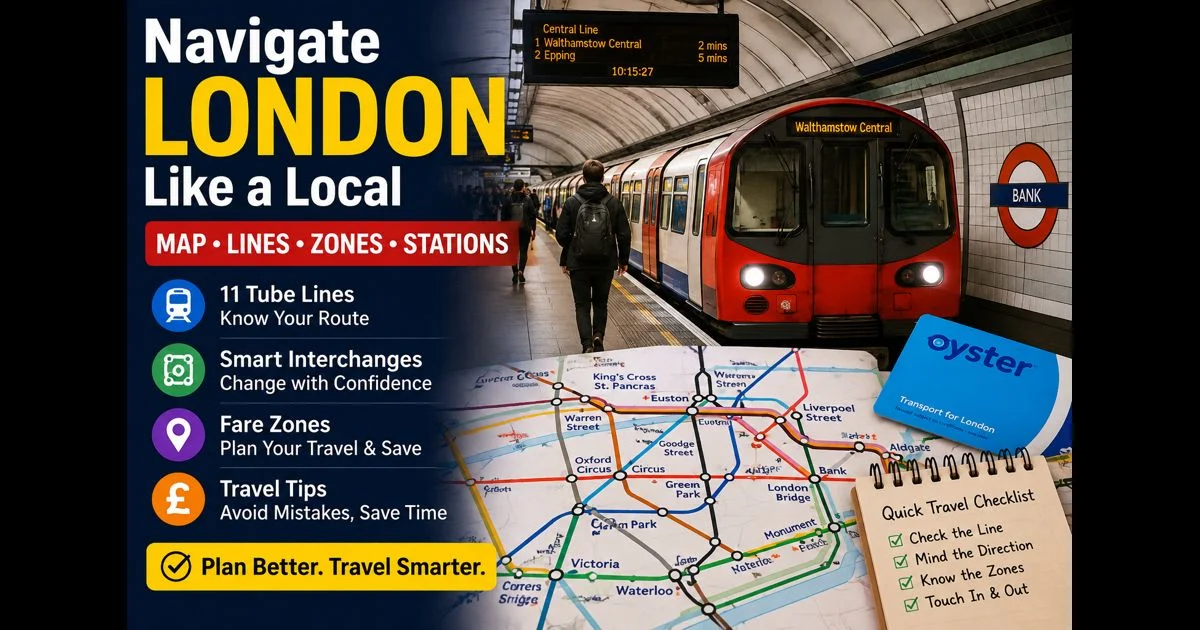
Each coloured line represents a London Underground route. The standard Tube map includes the 11 Underground lines:
- Bakerloo
- Central
- Circle
- District
- Hammersmith & City
- Jubilee
- Metropolitan
- Northern
- Piccadilly
- Victoria
- Waterloo & City
A line name and colour tell you the route family, but they do not always tell you the train’s final destination. Several lines split into branches, particularly the Northern, District and Metropolitan lines. Before boarding, check the platform display and the destination shown on the front or side of the train.
For example, the Northern line has different branches through central London and different southern destinations. A train on the correct colour line is not always the correct train for every station. Looking at the destination before entering is a simple habit that prevents an unnecessary change later.
The Tube map also displays other Transport for London services and rail connections in many areas. Depending on the map edition, these may include the Elizabeth line, London Overground, Docklands Light Railway, Trams and selected National Rail services. These connections can make a journey faster or more direct than using the Tube alone.
Understand That the Map Is Schematic
The London Tube map is not a conventional street map. Its job is to make a complicated network easy to read, so routes are shown using clear straight lines, angles and evenly spaced station markers.
This means the physical distance between stations is not always reflected by the distance on the map. In central London, two stations may be close enough to walk between, even if the map makes them appear separated. In outer London, stations that seem nearby on the diagram may be much farther apart.
Use the map to identify the network and possible changes. Use a journey planner or a street map when you need walking distance, step-free routing, platform information or real-time service details.
Read Station Symbols Carefully
Most stations are marked with a small line crossing or circle. The symbols become more important when a station serves more than one route.
A larger circle or grouped station marker usually indicates an interchange. This means passengers can change between lines at the same station, although the walk between platforms can vary widely. At some interchanges, the change is quick and direct. At others, it can involve long corridors, escalators or stairs.
Major interchange stations include Baker Street, Bank, Green Park, King’s Cross St Pancras, Liverpool Street, Oxford Circus, Paddington, Victoria, Waterloo and Westminster. They provide useful connections, but they can also be crowded at peak times.
Some map labels show a National Rail interchange, airport symbol, river-service link or walking connection. These details are useful when a journey continues beyond the Underground network.
It is worth checking station information before travelling if you have luggage, limited mobility, a pushchair, or a tight connection. A change that looks simple on the map may not be the easiest option in practice.
Use Fare Zones to Plan Costs
London’s public transport system is divided into fare zones. Zone 1 covers central London, where many major attractions, business districts, museums, theatres and railway terminals are located. The surrounding zones spread outward from the centre.
The Tube map shows the zone boundaries, helping passengers understand how far their trip extends across the fare system. The cost of a journey can depend on the zones travelled through, the time of day and the payment method used.
For most visitors and regular passengers, contactless payment or an Oyster card is the easiest way to pay as you go. Always use the same card, phone or device to touch in and touch out. Switching between cards or devices during a journey can prevent the system from calculating the journey correctly.
A few practical points help avoid fare problems:
- Touch in at the start of the journey and touch out at the end.
- Do not use one bank card to touch in and a different card or phone to touch out.
- Check the route if travelling to Heathrow, as airport journeys have separate fare considerations.
- Look up the exact fare before travel if cost is important, especially when travelling across several zones.
- Keep an eye on daily caps, but do not assume every rail service or airport route is included in the same way.
The zone layout is helpful, but it should not be the only factor when choosing a route. A slightly longer route with fewer changes may be more comfortable, particularly during busy hours.
Follow the Direction of Travel
Once you have selected a line, the next step is choosing the correct platform direction. Tube platforms are usually identified by the final destination of the train rather than simply “northbound” or “southbound.”
On the map, trace your route from the starting station to the destination. Look at the stations beyond your stop to understand which direction you need. If you are travelling from Piccadilly Circus to Heathrow Terminal 5 on the Piccadilly line, for example, follow the branch toward Heathrow and check that the train displays the correct terminal destination.
At station entrances and platforms, signs normally list the key destinations served in each direction. Platform displays provide the most reliable confirmation immediately before boarding.
If a train is heading to a different branch, wait for the next one rather than boarding and trying to correct the route later. This is especially useful on lines with multiple branches.
Plan Changes Before You Travel
Many journeys require one or more changes. The map makes this easy to see, but the best interchange is not always the most obvious one.
A good route usually balances three things:
- Fewer changes
- Shorter total travel time
- Easier station transfers
For visitors unfamiliar with the network, a journey with one comfortable change is often better than a route with two or three fast but confusing changes. This is particularly true when travelling with bags or children.
Avoid assuming that every interchange is step-free. Some stations offer step-free access from street to platform but not from platform to train. Others provide step-free movement between certain lines only. Check Transport for London’s latest accessibility guidance when an accessible route is needed.
During major disruptions, a planned interchange may also become crowded or temporarily unavailable. Check live service status shortly before leaving.
Recognise Branches and Shared Sections
Several Underground lines share tracks or have branches. This can make a map look more complicated, but the key is to focus on the destination and the stations that come after yours.
The District line, for instance, has multiple western branches. The Metropolitan line also has different destinations beyond its shared section. The Northern line is especially important to check because trains use different central London branches and southern routes.
A branch is not a problem if your chosen train serves your station. Read the destination on the platform display and look at the next stops shown inside the carriage. If uncertain, ask a member of staff before boarding or use the official journey planner.
Make Sense of Walking Connections
In central London, walking can sometimes be faster than changing trains. The Tube map may show nearby stations as separate points because they are on different lines, even though the street-level distance between them is manageable.
Walking is often worth considering when:
- Two stations are close together in central London
- An interchange requires a long underground walk
- A line is disrupted or heavily crowded
- You want to see the area rather than travel underground
Do not assume every nearby-looking station is an easy walk. Busy roads, crossing points, weather, luggage and accessibility needs all matter. A street map or walking route planner gives a more realistic picture.
Check Service Status Before Setting Off
The Tube map shows the permanent network, not the day’s operating conditions. Engineering work, station closures, lift repairs and service disruptions can change the best route.
Before travelling, check the current status for the relevant line and stations. This is especially important on weekends, late evenings, public holidays and during planned works.
If one line is suspended, the map can help you find an alternative. Look for parallel lines, nearby rail services, or stations where a different route connects with your destination. A short bus journey or walk may also be the most sensible replacement.
Use the Map With Accessibility in Mind
The standard London Tube map includes accessibility symbols, but a dedicated step-free map provides more detailed information. Step-free travel is not identical at every accessible station. Some stations provide step-free access from street to platform, while others provide access all the way from street to train.
For an accessible journey, check:
- Whether both your starting and destination stations are step-free
- Whether the necessary interchange is step-free
- Whether boarding assistance or a ramp may be required
- Whether lifts or escalators are temporarily out of service
- Whether the route depends on a particular entrance or direction of travel
Planning this in advance makes a significant difference. It also avoids arriving at a station only to find that the route involves stairs or an unavailable lift.
A Simple Way to Read Any Tube Journey
When using the London Tube map for a journey, follow this order:
- Find your starting station.
- Find your destination station.
- Trace the coloured line or lines between them.
- Identify any interchange station.
- Check the train’s destination and branch before boarding.
- Look at the fare zones involved.
- Check live status, station closures and accessibility details if needed.
This approach keeps the map useful without making travel feel complicated.
Travel With More Confidence
The London Tube map is most useful when treated as a network guide rather than a precise map of London. It shows the lines, connections, branches and fare zones needed to make informed travel choices. With a quick check of the correct direction, service status and station access, it becomes much easier to move around the city confidently.
For every journey, use the map to understand the route, then confirm the live details before you travel. That combination is the most reliable way to navigate London’s Underground network.
